> For the complete documentation index, see [llms.txt](https://docs.slapfive.com/llms.txt). Markdown versions of documentation pages are available by appending `.md` to page URLs; this page is available as [Markdown](https://docs.slapfive.com/integrations/salesforce/slapfive-app-spring-2024-4.0-and-earlier-versions/2.-create-a-named-credential.md).
# 2. Create a Named Credential
In this step, you create a Named Credential record that let's Salesforce access the SlapFive API.
{% hint style="info" %}
NOTE: If you are installing or configuring Version 3.1 or earlier of the SlapFive Salesforce App, skip this step and go to Configure Custom Settings.
{% endhint %}
Go to **Setup** > **Security** > **Named Credentials**.
In the dropdown menu next to the **New** button, click **New Legacy** to create a new Named Credential record.
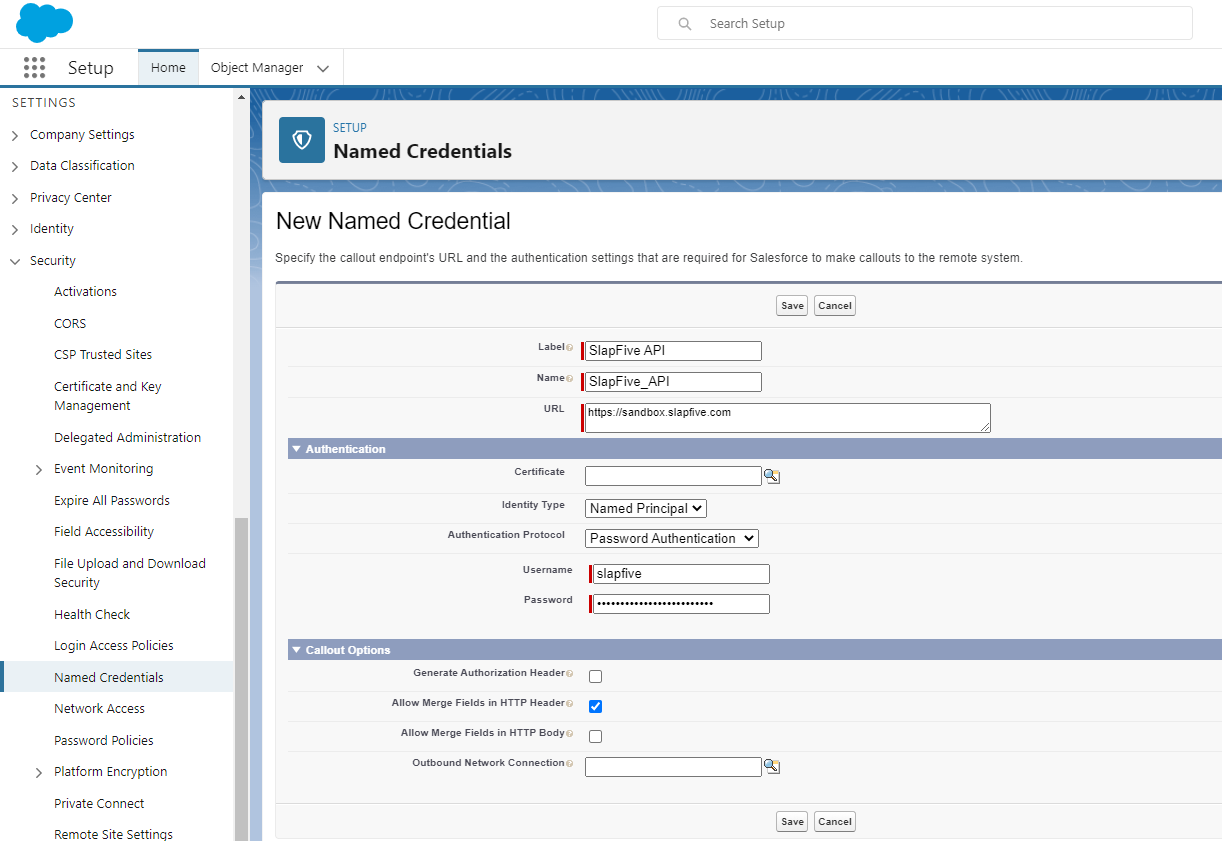
Create a new Named Credential record
When creating the new record:
* [ ] **Label:** enter *SlapFive API*.
* [ ] **Name:** will auto-fill with *SlapFive\_API*, do not change it.
* [ ] **URL:** enter the base URL of your SlapFive instance, which is .
* [ ] **Identity Type:** select **Named Principal**.
* [ ] **Authentication Protocol:** select **Password Authentication**.
* [ ] **Username:** enter *slapfive*.
* [ ] **Password:** paste your **SlapFive API Key**. To get this key, log into SlapFive, go into your Client Settings, generate an API key if one doesn't already exist, copy the API Key and paste it in this field.
* [ ] **Generate Authorization Header:** uncheck this field.
* [ ] **Allow Merge Fields in HTTP Header:** check this field.
Click the **Save** button to create the new Named Credential.